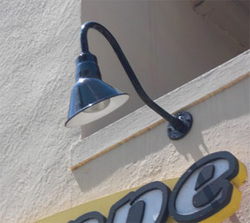
Gooseneck Lights
If you are looking for lighting fixtures that will go along with almost all themes you have in mind, gooseneck lighting can make it happen. As sign lighting, gooseneck lights will let your signs and storefront show off its beauty and appeal to the public. Gooseneck lights are commonly made out of high commercial grade aluminum and then powder coated for extra protection in outdoor environments for long lasting appearance and usage. Most of the reflector and gooseneck arm configurations can be made into a compact fluorescent gooseneck light fixture, metal halide or a low pressure sodium. Thus this is a perfect fixture that you need for your store appeal and ambiance.
Prior to purchasing the right gooseneck outdoor lighting fixture be sure that you chose the appropriate color, bulb and housing of your gooseneck lights that will compliment your store's image. You can also customize your own gooseneck sign lights according to your needs. Once you finally choose your own gooseneck outdoor lighting system, begin installing the fixture.
1. Disconect power supply at the main electrical box or your power pack before installing your gooseneck sign lights.
It is very important to make sure that you are working safely. To avoid accident it is important that you turn off all power supply present in your working area.
2. Verify that wires from shade are long enough for arm provided.
Measure the length of your gooseneck arm to verify the exact length of the wire to be inserted. This is to make sure that your wire and bulb are intact to avoid loose or bad connection.
3. Feed lead wires through arm and thread shade onto arm.
Verify that wires can penetrate through the arm of your gooseneck sign lights.
4. Insert small gasket into wall plate. Place arm into wall plate and tighten set screws. Set large gasket in place.
5. Make wiring connections according to local and national code.
Usually for 15- 21 wattage, 21 AWG is used. It is important to determine the wattage of you lighting system to verify the correct wire for your gooseneck lighting
6. Attach wall plate with arm assembly to junction box.
7. With wall plate mounted, loosen set screws and adjust arm to correct position. After adjusted, place arm in wall plate firmly and tighten set screws.
8. Use generic sealant to prevent water entry.
If you have trouble in installing your gooseneck outdoor lighting system you can contact any local stores that sell these items for advices. But once you have installed these correctly, your store will look exceptionally extraordinary.
 RSS Feed
